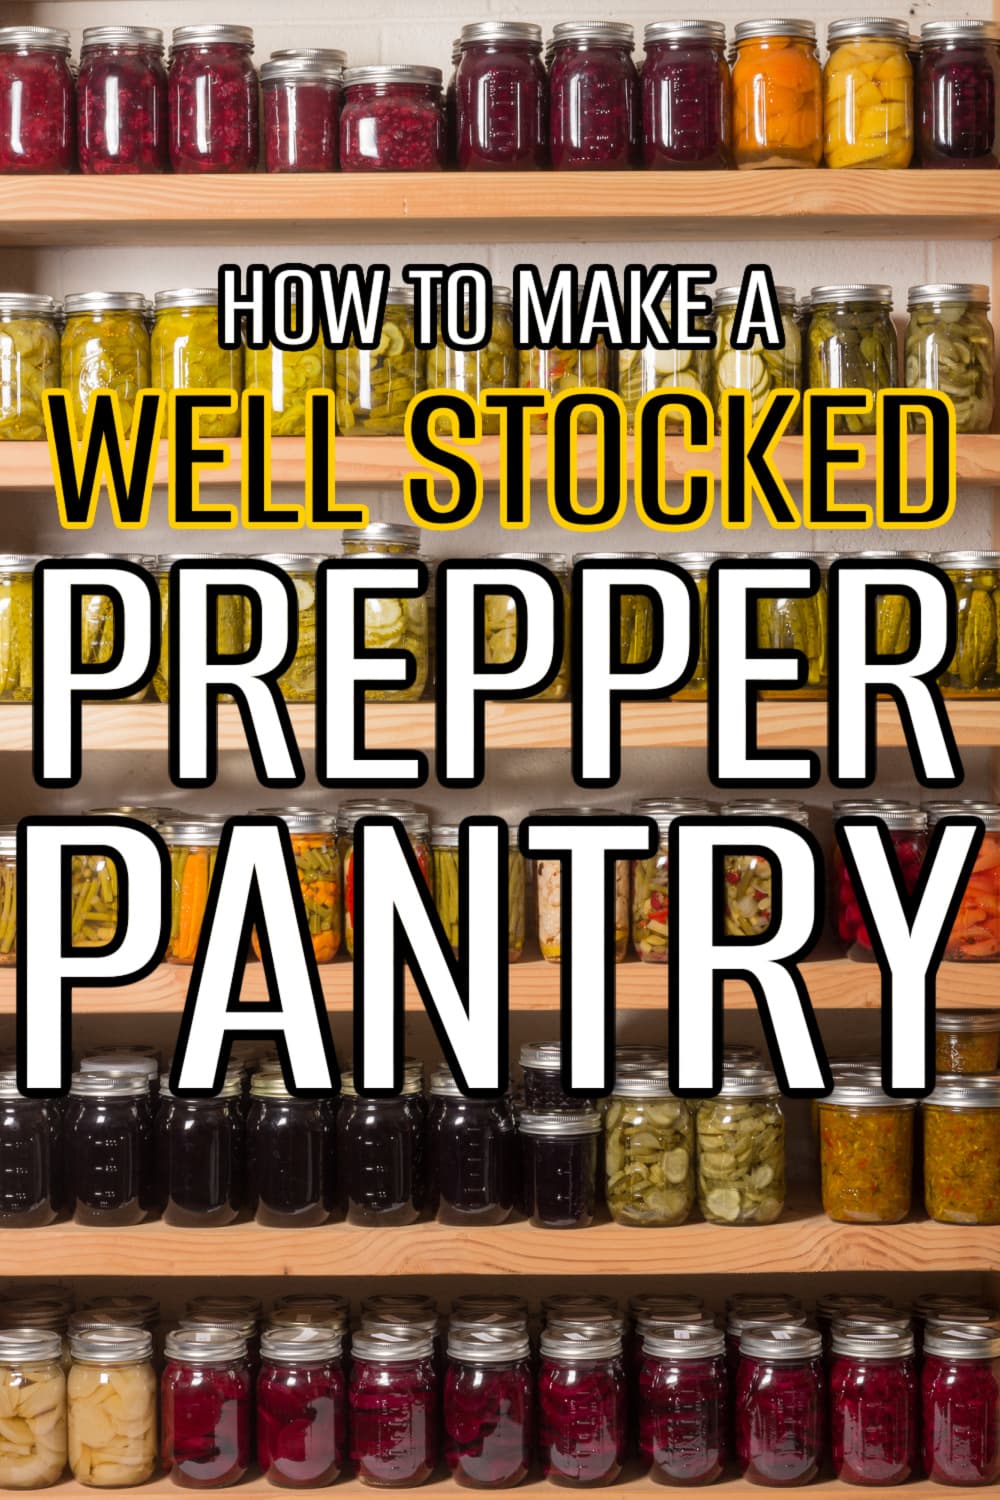
Building a Practical Prepper Pantry for Everyday Peace of Mind
Life has a funny way of throwing curveballs, doesn’t it?
Whether it’s a storm that knocks out power, an unexpected job loss, or just wanting a little extra peace of mind, having a well-stocked pantry can make all the difference.
Building a prepper pantry isn’t about panic or worst-case scenarios. It’s about feeling secure, prepared, and ready for whatever comes your way.
In this post, I’ll share some simple, realistic ways to stock, organize, and maintain your pantry so you can rest a little easier knowing you’ve got your bases covered.
Pin this post for later!
(This post contains affiliate links. If you click one and make a purchase, I may receive a commission at no extra cost to you. Read the disclaimer here. Thank you for your support!)
When it comes to building up your pantry, it probably won’t surprise you that shelf-stable foods are your best friend.
I’m talking canned fruits and veggies, beans, meats, and those trusty dried staples like rice and flour.
Don’t forget all the important things that make food actually taste good!
Peanut butter, bouillon cubes, and a good stash of spices can go a long way toward keeping your meals interesting (and comforting) when options are limited.
Of course, having the food is only half the story. Keeping it organized is what really makes it work.
A good shelving setup makes it easy to see what you’ve got, rotate things out before they expire, and grab what you need without digging through chaos.
Whether you’ve got a whole room for storage or you’re making the most of a hallway cabinet, a bit of organization will save you so much time and stress later.
So grab your favorite hot beverage, and let’s dive into what you need for a well-stocked, easy-to-manage prepper pantry!
Why You Need a Prepper Pantry
Natural Disaster Preparedness
You never really know when life’s going to throw a wrench in things.
Whether it’s a storm, a power outage, or something bigger that cuts off access to the basics like food and water.
We’ve had a few stretches where the power was out for days (one of them right in the middle of July!), and I can tell you- I was so thankful we had a few supplies tucked away.
Having a prepper pantry isn’t about expecting the worst. It’s about being ready for the unexpected.
When things get unpredictable, you’ll have peace of mind knowing there’s plenty of food and water on hand for you and your family.
Long-Term Food Storage
A good prepper pantry isn’t just about “doomsday prepping”… it’s really about having some peace of mind and knowing your family’s covered if life throws you a curveball.
It’s all about long-term food storage that actually makes sense: canned goods, dried foods, and other shelf-stable staples that won’t go bad anytime soon.
With a little planning, you can build a pantry that keeps your food safe and ready for the long haul.
If you want to take it a step further, you can even pick up large #10 cans of emergency foods that last up to 20 years (!), perfect for deep storage or those “just in case” situations.
And once your garden starts overflowing (because it will!), you’ll be glad to have ways to preserve all that goodness you worked so hard to grow. Whether it’s canning, dehydrating, or freezing, you’ll be turning your harvest into pantry gold before you know it.
Emergency Food Supply
When you’re putting together a prepper pantry, the goal is pretty simple.
Build up a stash of food that can last you anywhere from a few months to a year.
Think of it as your safety net for real-life “just in case” moments… things like a job loss, an illness, or even times when the grocery store shelves are looking a little bare.
Having that extra supply tucked away means you won’t have to panic or run out for last-minute essentials when life gets unpredictable.
A great first goal is to aim for about a three-month supply of food per person in your household.
And don’t forget water! It’s easy to overlook, but it’s one of the most important things to store.
Choosing the Right Foods
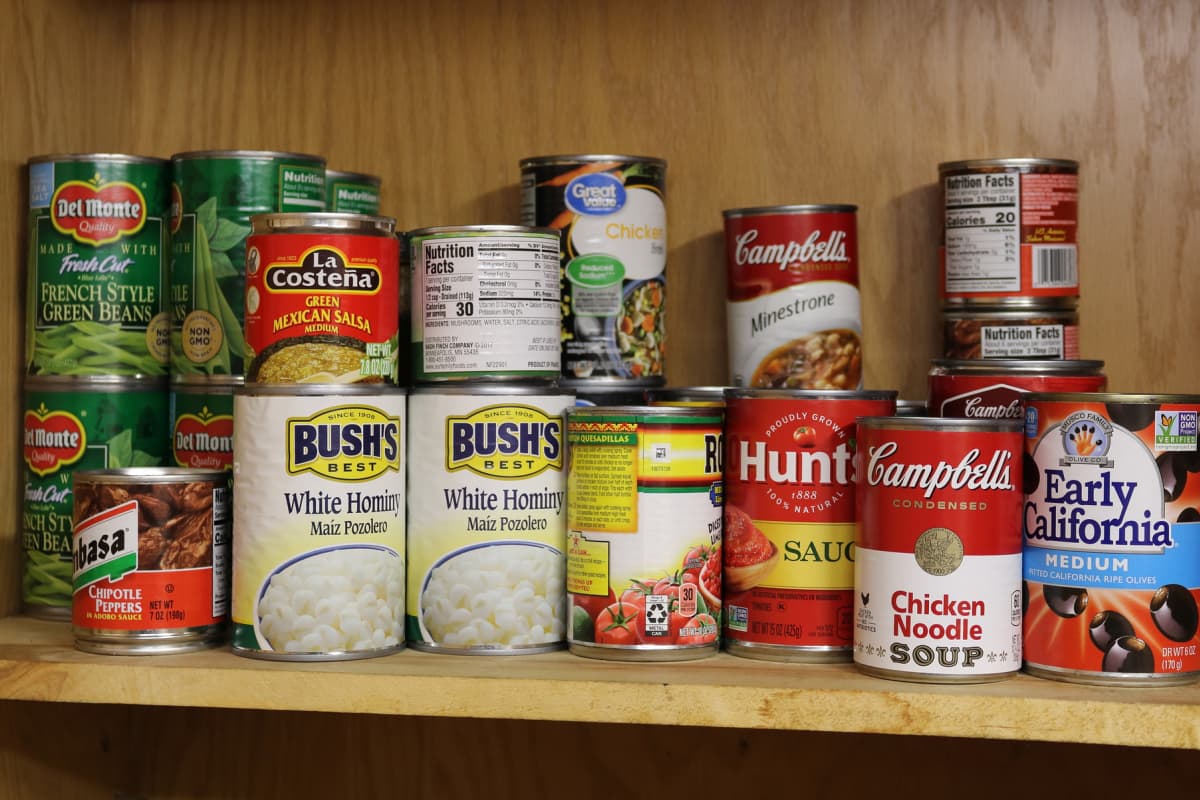
Canned Goods
When you’re getting started, canned goods are your best friend. They’re easy to find, last forever, and make it simple to build up your pantry little by little.
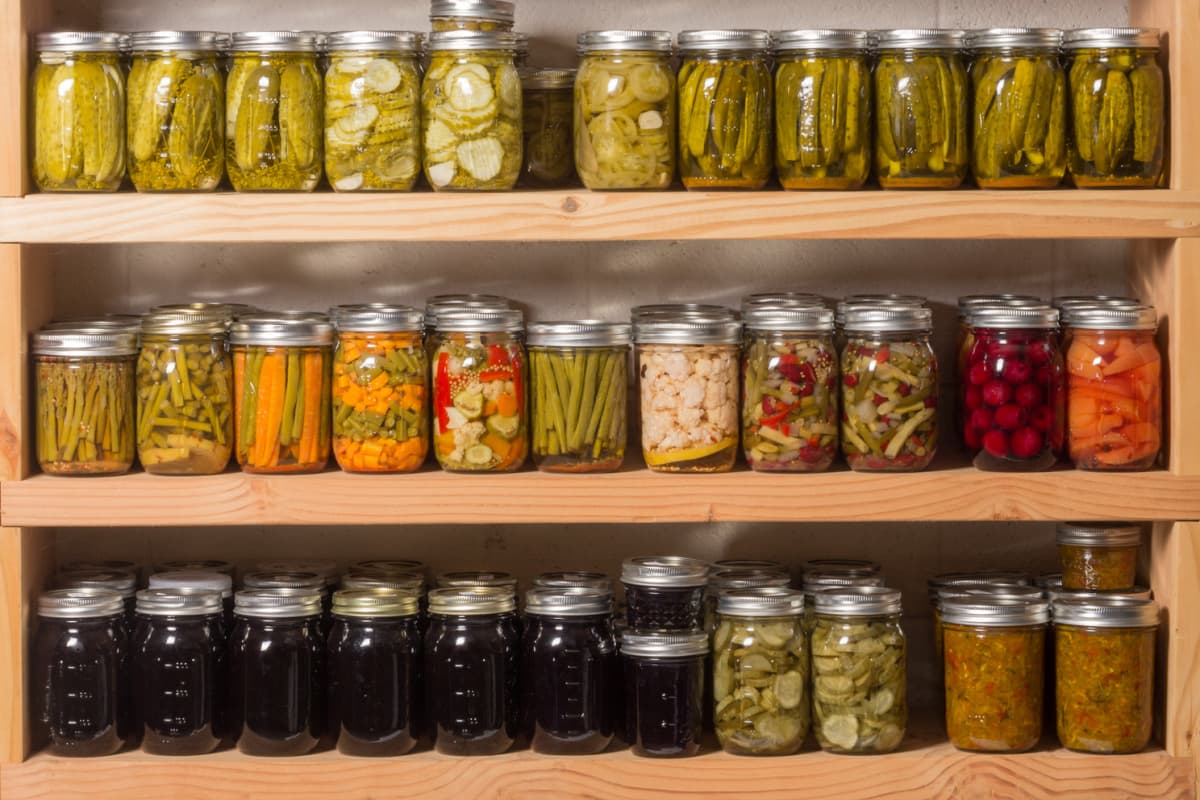
Grab a mix of canned fruits, veggies, meats, and soups so you’ve got plenty of variety when you need it.
Just make sure to check expiration dates once in a while and rotate things out so nothing gets forgotten in the back of the shelf. (Trust me, this is such a bummer!)
A quick tip: skip cans that are dented along the seams. Better safe than sorry. (Botulism is no joke, my friend.)
And don’t forget to watch for sales! Stock up on beans, tuna, chicken, and veggies when they’re marked down. It adds up fast and saves you a ton in the long run.
Dry Foods
Dry goods are another must-have for a solid prepper pantry. Things like rice, pasta, beans, and oats are hearty, filling, and keep for ages when stored right.
To make sure they stay fresh (and bug-free), keep them in airtight containers or go the extra mile with mylar bags and oxygen absorbers.
Once they’re sealed up, pop those bags into food-safe 5-gallon buckets with a tight-fitting lid. That’ll keep everything dry, long-lasting, and totally pest-proof.
It takes a little time up front, but you’ll thank yourself later when your pantry’s neatly packed and ready for anything.
Dehydrated Foods
Dehydrated foods are another great addition to your pantry! They take up hardly any space and last for ages when stored correctly.
You can dry fruits, veggies, and even meats, and as long as they’re kept in a cool, dry spot inside airtight containers, they’ll stay good for months (or even longer).
You can buy pre-made dehydrated foods if you want to save time, but having your own dehydrator opens up a whole new world.
I love making dehydrated apple slices- though honestly, they never make it to long-term storage because everyone eats them the same day I make them! lol
Freeze Dried Foods
Freeze-dried foods are another awesome option for your prepper pantry.
They last practically forever, don’t take up much space, and are super lightweight, which is perfect for long-term storage.
The freeze-drying process pulls all the moisture out of the food, which keeps it from spoiling or growing anything funky.
The best part? It still keeps most of its flavor and nutrients, so when you rehydrate it, it actually tastes like real food… not cardboard!
You can find freeze-dried fruits, veggies, meats, and even full meals these days, which makes it easy to build a well-rounded pantry without a ton of effort.
They can be a little pricey, and you’ll need water to rehydrate them, but the shelf life and quality are hard to beat.
If you’ve got a big garden or you’re part of a CSA, it might even be worth investing in your own freeze dryer down the road.
The Harvest Right freeze dryer is a favorite among serious preppers. (Myself included!)
With one of those, you can store food for years and it’ll taste like the day you made it. Seriously!
Survival Foods
And finally, it’s worth setting aside a few survival foods for true long-term storage. These are made specifically for emergencies and have an incredibly long shelf life.
Things like freeze-dried meals, meal replacement bars, and even water pouches can be lifesavers when fresh food isn’t an option.
Just make sure to pick things you’ll actually want to eat. If it doesn’t sound good now, it won’t magically taste better in an emergency!
By mixing in canned goods, dry staples, dehydrated foods, and a few survival options, you’ll have a well-rounded prepper pantry that keeps you covered for just about anything.
One of my favorite places to stock up is My Patriot Supply. Their selection is great, the prices are fair, and the quality has been awesome every time I’ve ordered.
Storage Containers
When it comes to long-term food storage, your containers make a huge difference. Here are some of my favorite options and how I use them:
Mylar Bags
Mylar bags are amazing for storing dry goods like beans, rice, and pasta. They’re tough, they block out light and moisture, and they keep bugs away… which is everything you want in a storage setup.
To seal them up, you’ll need oxygen absorbers and a heat sealer. Just fill the bag, toss in an oxygen absorber, and seal it shut. Easy!
And here’s a little trick- if you don’t have a heat sealer, a hair straightener works perfectly. That’s what I used to use!
Food Grade 5 Gallon Buckets
If you’re storing bigger quantities, food-grade 5-gallon buckets are the way to go. They’re sturdy, have airtight lids, and keep your food safe from moisture and pests.
Just make sure they’re actually food-grade (that part’s VERY important) so you don’t have to worry about chemicals leaching into your food.
For the best protection, store your food inside Mylar bags first, then tuck those into the buckets. It’s an extra step, but it really helps everything last longer.
Check your local farm supply store- I’ve found great ones at Blain’s Farm & Fleet that we’ve been using for years.
Mason Jars
Mason jars are perfect for smaller batches of food, spices, seeds, or anything you’ve home-canned. They’re reusable, airtight, and look so satisfying lined up on a pantry shelf.
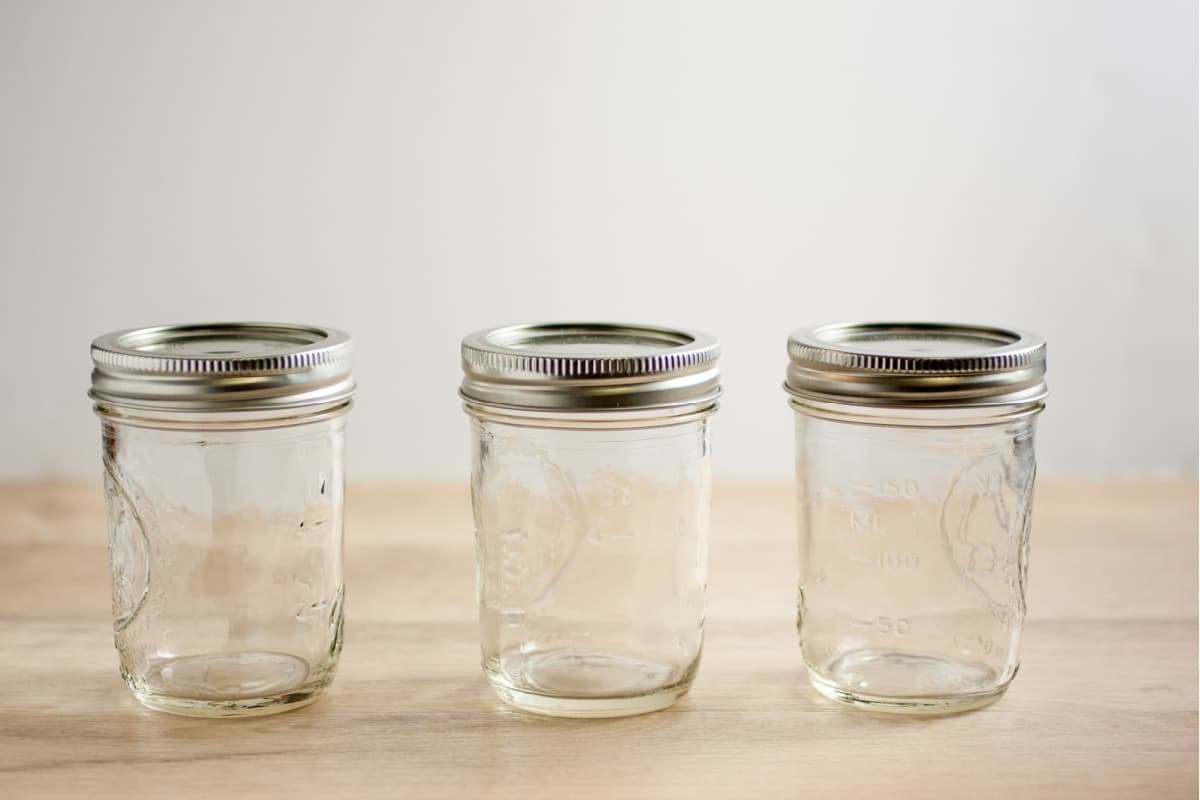
If you’re canning, always check the lids to make sure they’ve sealed properly, and label the jars with what’s inside and the date you canned it.
For dry goods, you can use a vacuum sealer with a jar attachment to suck out the air, or just drop in a couple oxygen absorbers before sealing.
Either way, it’ll help everything stay fresh much longer.
Plastic Bins
Plastic bins with tight-fitting lids are another great option for pantry storage… especially for things like boxed pasta, granola bars, and other pre-packaged snacks.
Look for bins that are food-safe, stackable, and pest-proof, and make sure they’re easy to label so you can keep everything organized.
I actually found some perfect bins at Walmart that now hold our kids’ mac and cheese stockpile– highly recommend!
And seriously, good storage containers are worth every penny. You don’t want to spend all that time and money building up your food stash just to find out something went bad or a few sneaky critters found their way in.
Using sturdy, sealed containers will keep your food fresh, safe, and easy to grab when you need it.
Organizing Your Prepper Pantry
Prepper Pantry Inventory List
Keeping an inventory list might not sound exciting, but it’s one of the best ways to stay on top of your pantry.
It helps you see what you’ve got, what’s running low, and what’s getting close to expiring- so nothing goes to waste.
Start by making a simple list of everything you’re storing, along with the quantity and expiration date.
You can jot it down in a notebook, use a spreadsheet, or even a dry-erase board on the wall. Whatever works best for you.
Don’t forget to include non-food essentials too, like first aid supplies, candles, and anything else that would come in handy during an emergency.
Shelf Organization Ideas
A little organization goes a long way when it comes to keeping your pantry useful (and not overwhelming). Try setting things up by category:
- Long shelf-life items: Store long-lasting foods like rice, beans, and canned goods on the lower shelves. Put the ones that expire soonest toward the front so you use them first.
- Short shelf-life items: Keep things like baking ingredients at eye level so you can easily keep an eye on freshness.
- Frequently used items: Put your everyday staples (salt, sugar, coffee, etc.) in the easiest-to-reach spots.
- Non-food items: Have a dedicated section for water, batteries, and emergency supplies so you’re not digging through cans to find a flashlight later.
Optimizing Space
If your pantry space is on the smaller side (or you’re just getting creative with storage), there are lots of ways to make it work:
- Stackable buckets: Great for grains, beans, and pasta. They save space and keep everything sealed up tight.
- Use your wall space: Add shelves or wall organizers to take advantage of vertical space.
- Think upward: If you’ve got tall ceilings, use that space! Install a few higher shelves for things you don’t need to grab often.
- Hidden spots: Don’t overlook those “weird” spaces! Under beds, in closets, even a crawl space can be turned into bonus storage.
Wherever you set up your pantry, try to keep it cool, dry, and out of direct sunlight.
Room temperature is perfect. (Heat and humidity can shorten shelf life fast.)
And if possible, plan your space near a reliable water source, or at least make sure you’ve got some water stored nearby.
Maintaining Your Prepper Pantry
Shelf Life and Storage Conditions
If you want your prepper pantry to really work for you, keeping an eye on storage conditions is key.
Temperature, humidity, and light all play a big role in how long your food lasts.
Try to store everything in a cool, dark, and dry place. Think basement, closet, or even a shaded corner of the house. It doesn’t have to be fancy- just consistent and out of direct sunlight.
Checking Expiration Dates
It might sound obvious, but checking expiration dates regularly makes a big difference. It helps you spot anything that’s getting close to expiring so you can plan to use it up before it goes bad.
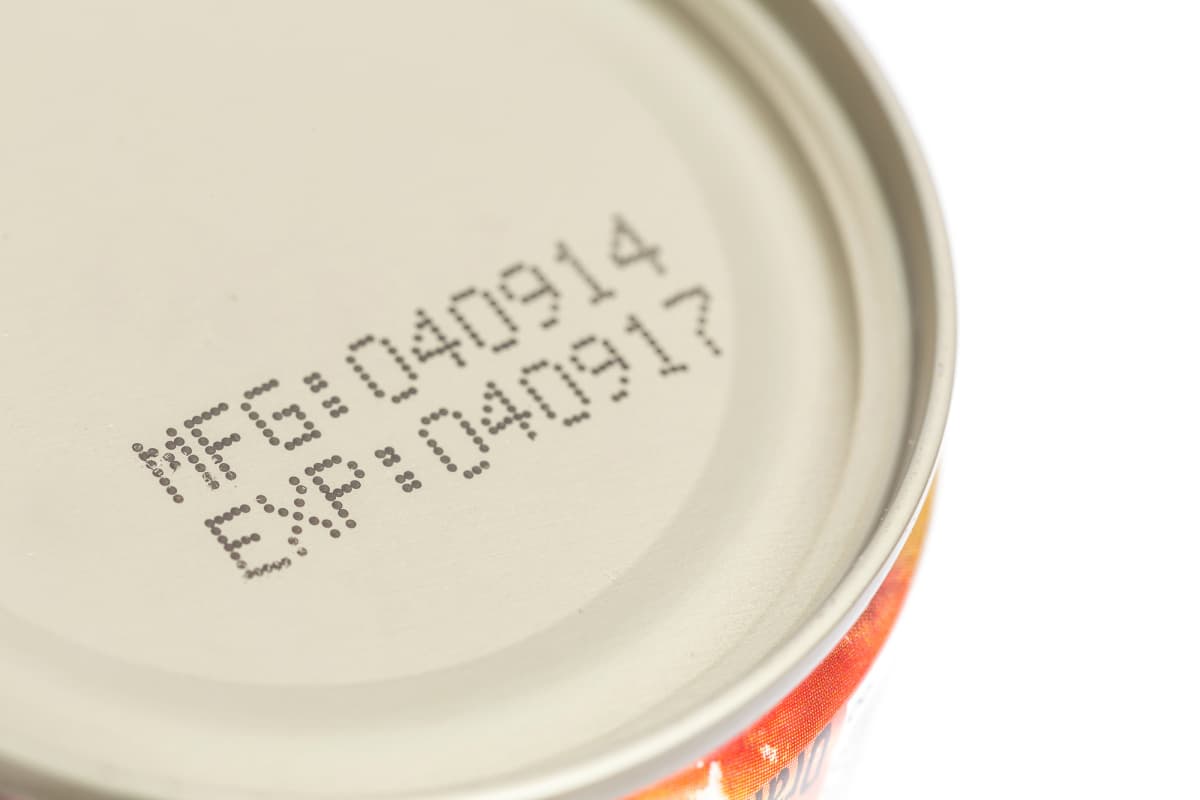
You don’t need anything complicated- a simple list or spreadsheet works great.
Some people even use a whiteboard inside their pantry door to jot down what needs to be used soon.
Rotating Your Stock
A little rotation goes a long way toward preventing waste. The idea is simple: use the oldest stuff first.
When you restock, put new cans and packages in the back and move the older ones to the front.
That’s the FIFO method (First In, First Out). It keeps everything fresh and makes sure you’re eating what you’ve stored instead of letting it expire quietly in the back of the shelf. (We’ve all been there…)
Replenishing As You Use Stuff
Finally, make a habit of replacing things as you use them.
When you open the last can of something or finish off a bag of rice, add it to your shopping list right away.
And if you catch a good sale on staples you use often, that’s the perfect time to restock.
With a little consistency, you’ll always have a well-stocked pantry that’s ready for anything- no panic shopping required.
Additional Helpful Prepper Items to Have on Hand
Medical Supplies
Don’t forget to keep a basic medical kit as part of your prepper setup. It’s one of those things you’ll be really glad you have if you ever need it.
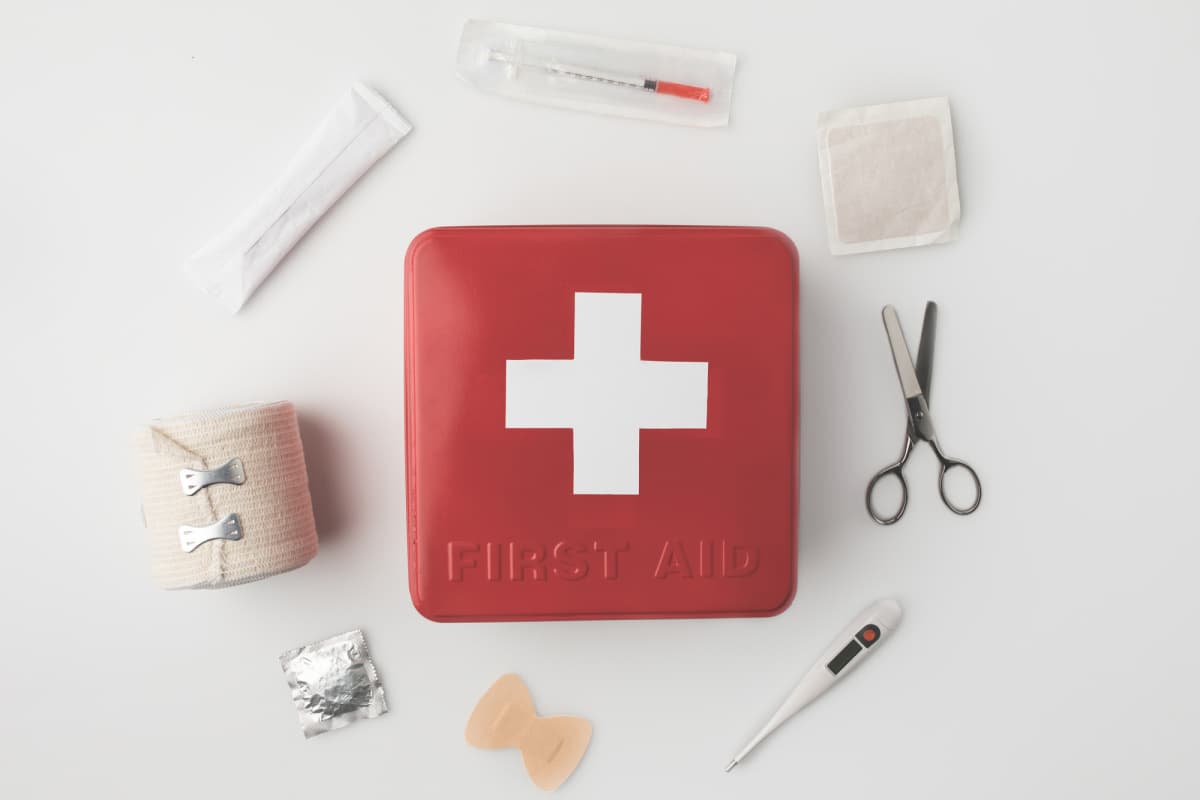
Your kit should include things like:
- Band-aids
- Gauze
- Medical tape
- Antiseptic wipes
- Tweezers
- Scissors
- Pain relievers (aspirin or ibuprofen)
- Allergy medicine (antihistamines)
Make a note to check expiration dates every so often and restock anything you’ve used- it’s easy to forget until you need it!
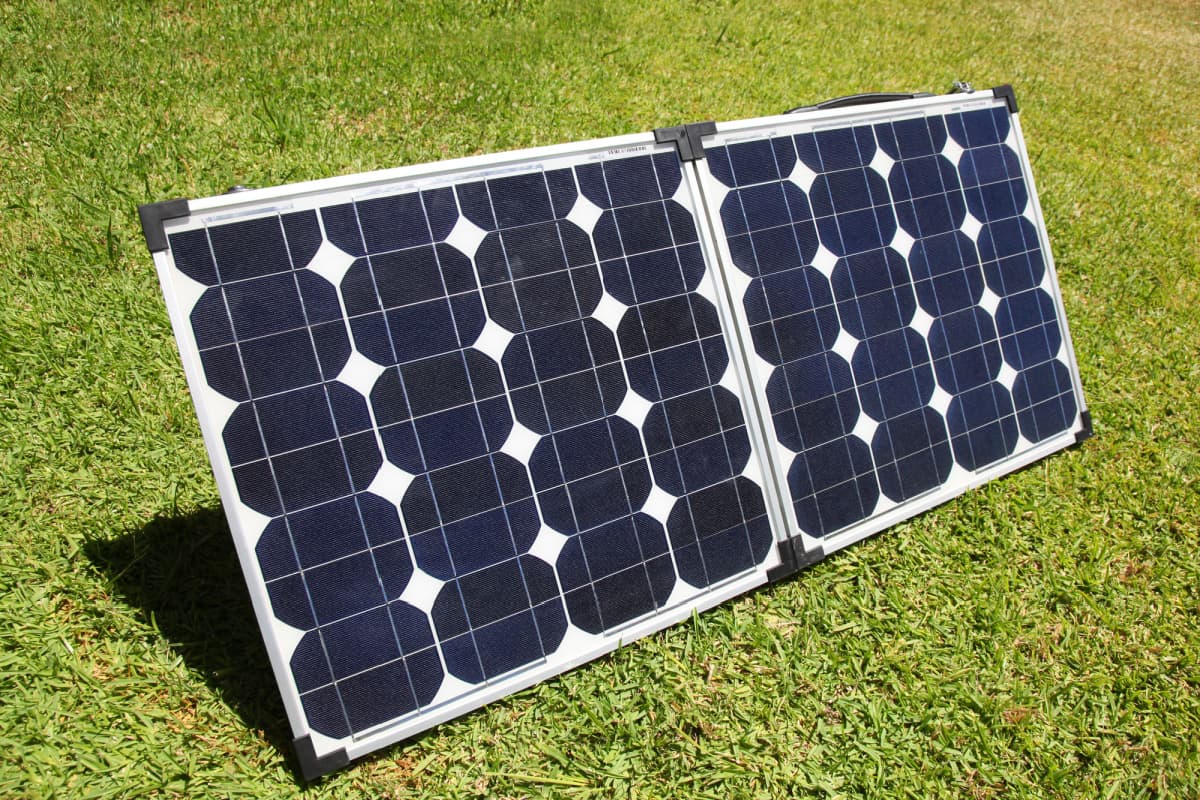
Solar Panels
If you really want to take your prepping up a notch, solar panels are an amazing investment. They give you a renewable energy source in case of a power outage or if you’re ever in an off-grid situation.
You can use them to power:
- Lights
- Electronic devices
- Small appliances
- Even some heating or cooling systems
Do a little research to find a system that fits your needs and budget.
And if full panels aren’t in the cards yet, even a portable solar charger can be a lifesaver for phones or small devices during an emergency.
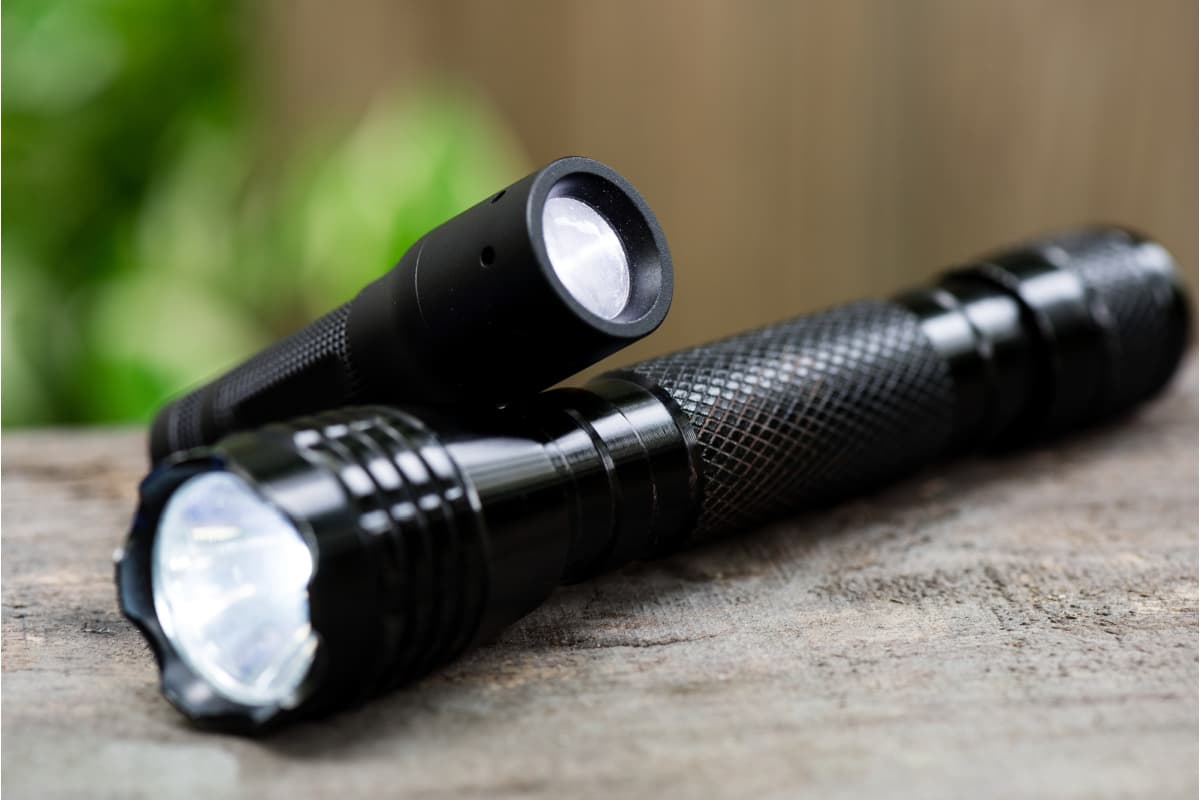
Emergency Supplies
A few basic emergency supplies can make a huge difference when things don’t go as planned. Some good ones to have on hand include:
- Flashlights
- Batteries
- A portable radio
- Multi-tool
- Duct tape
- Rope or paracord
- Matches or a lighter
- Emergency blankets
Keep all of it together in one easy-to-grab spot, so you’re not hunting through drawers if the lights go out.
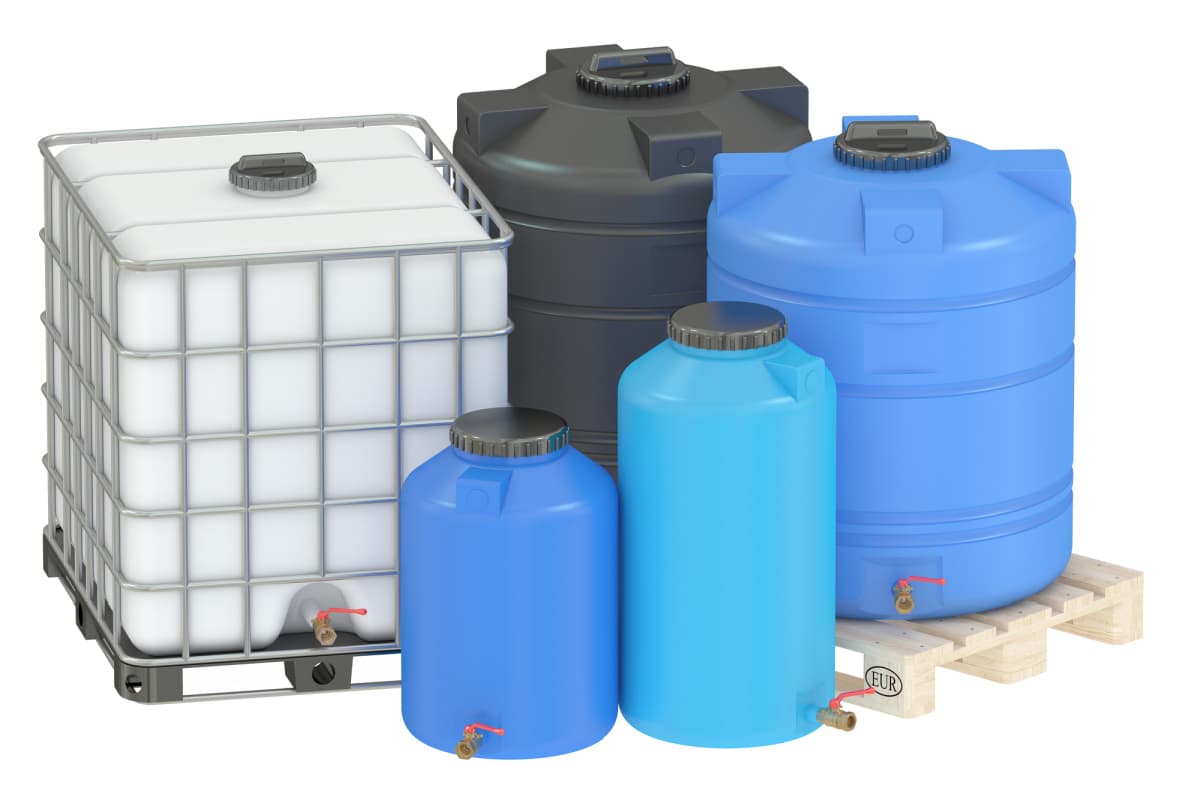
Water Storage
Water is the most important thing to have stored. You can go a while without food, but not without water.
Some good storage options include:
- Large water containers (5–7 gallons)
- Stackable water bricks
- A WaterBOB (a big liner you can fill in your bathtub before a storm hits)
If you’re storing tap water long-term, add a little bit of unscented household bleach to keep it safe from bacteria and algae growth- about ⅛ teaspoon (8 drops) per gallon of water does the trick.
Just make sure the bleach doesn’t have any added fragrances or cleaners, and give the container a good seal before storing it away.
A good rule of thumb: plan for at least one gallon of water per person per day, for a minimum of two weeks. More if you can manage it!
Water Purification
Along with storage, make sure you’ve got a way to purify water if needed. There are a few easy options:
- Boiling
- Chlorine or iodine tablets
- Portable filters (like LifeStraw or Sawyer Mini)
- Gravity-fed filters
It’s worth spending a little time researching what fits your situation best — even a small filter setup can make a big difference in an emergency.
In Conclusion
I hope this prepper pantry guide gave you plenty of ideas and a good starting point for building your own!
You don’t have to do it all at once- start small, add a few extra cans or dry goods each week, and it’ll add up faster than you think.
If you’ve got any great tips, storage ideas, or questions, drop them in the comments- I’d love to hear how you’re setting up your own pantry!